How to Use Status Meter
Get started with Status Meter in a few simple steps.
1. Install the App
Start by installing Status Meter from the monday.com marketplace. Go to the marketplace, find Status Meter, and click "Install app".

Note:
You'll need admin access to install apps in your monday.com workspace.
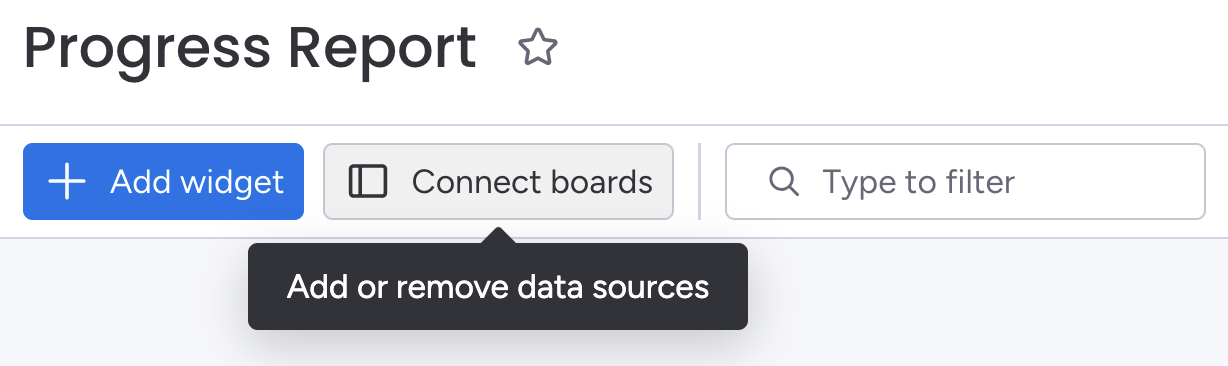
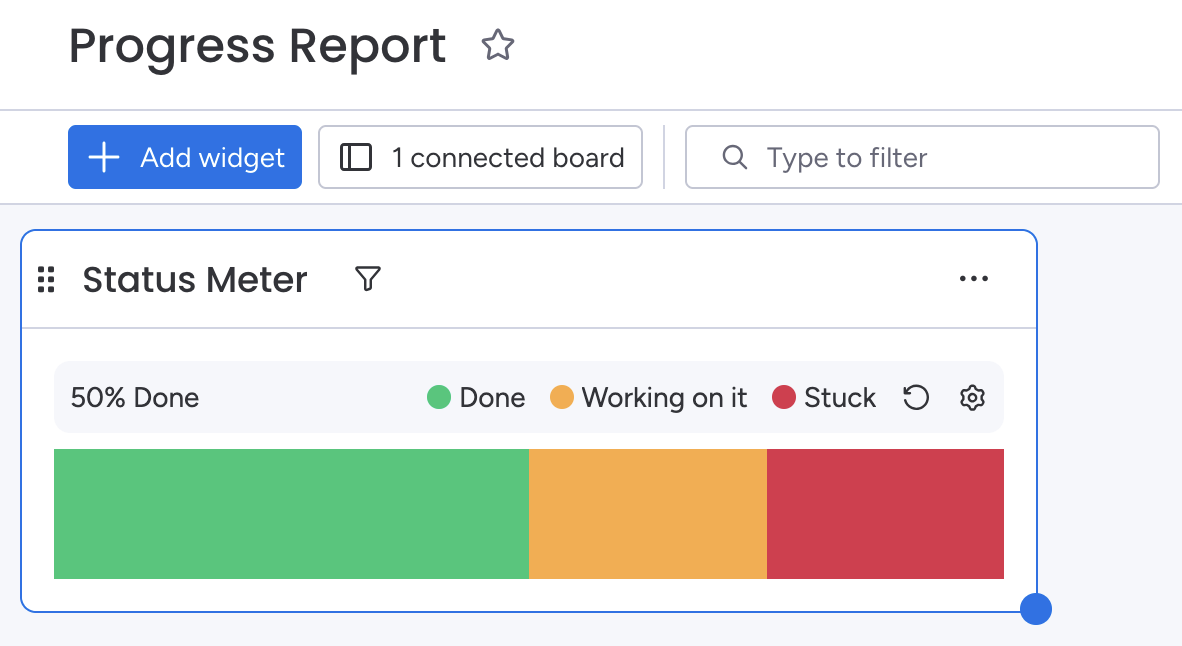
2. Add the Widget to a Dashboard
Create a dashboard where you want to display your progress bars, then add the Status Meter widget to that dashboard.
-
Create a new dashboard or open an existing one.

-
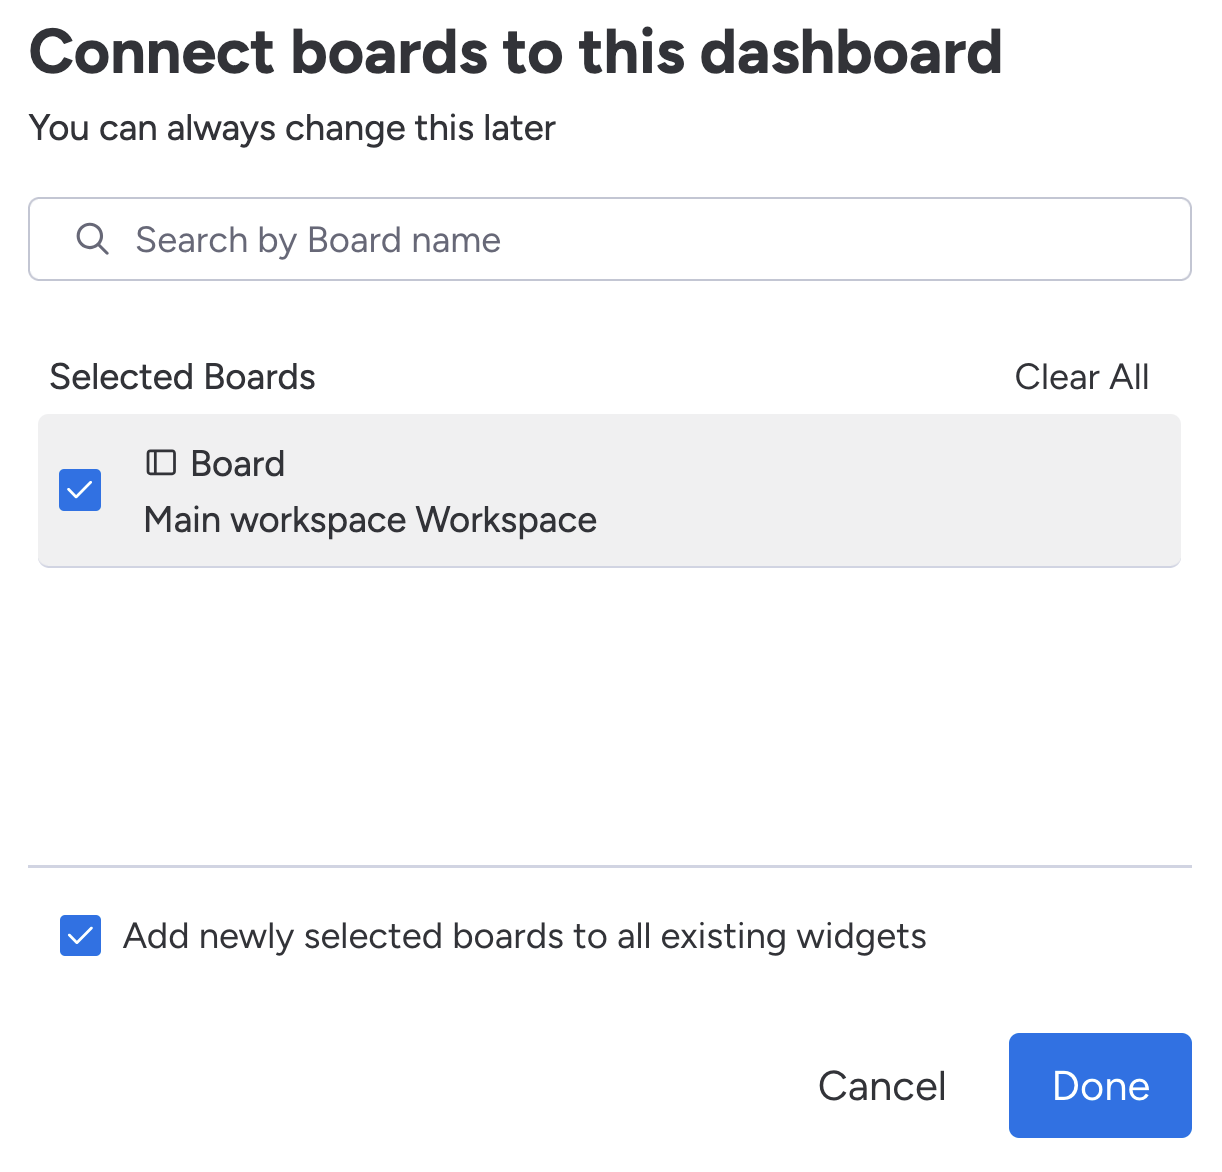
Connect a board to the dashboard if you haven't already done so.
Even though Status Meter is not taking into consideration the
board connected to the dashboard, monday.com requires at least one
board to be connected.
-
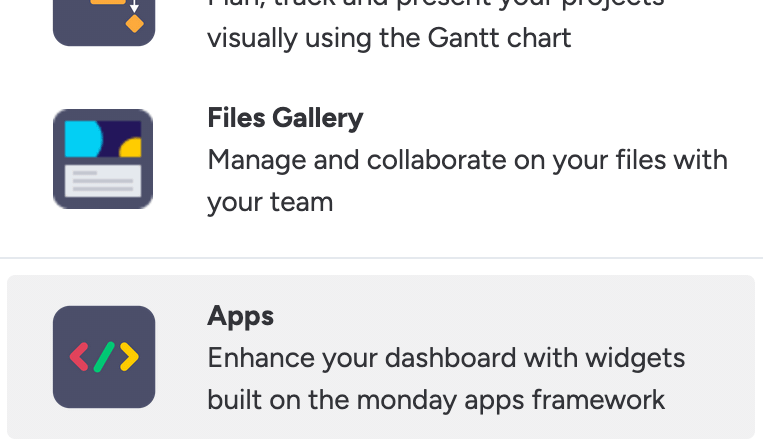
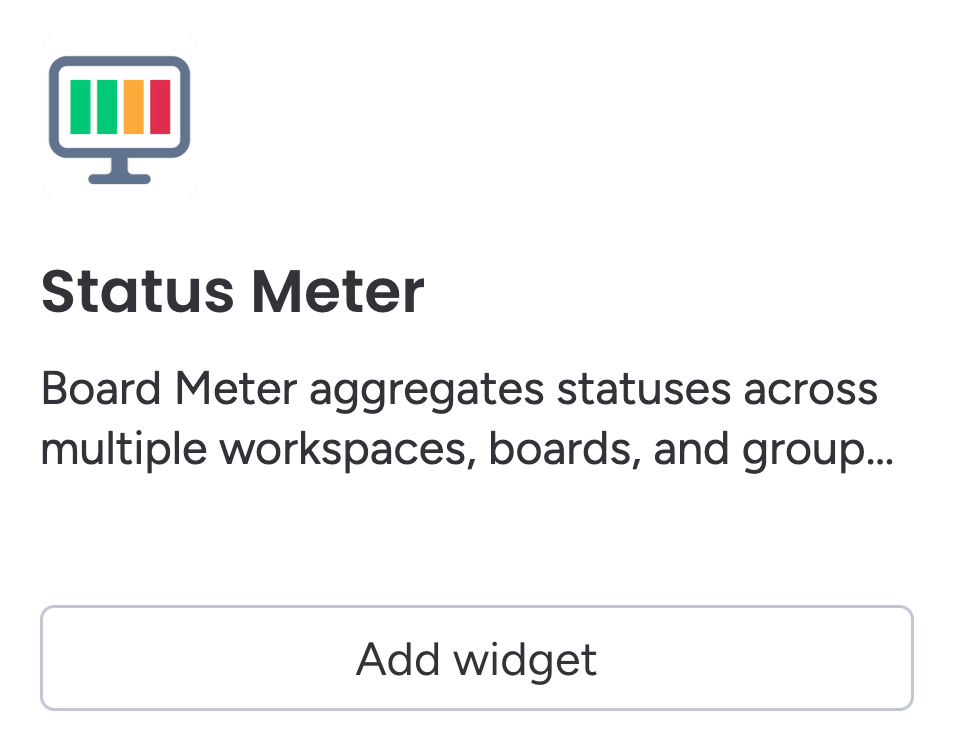
Click "Add Widget", select "Apps", then select "Status Meter" from
the list.
-
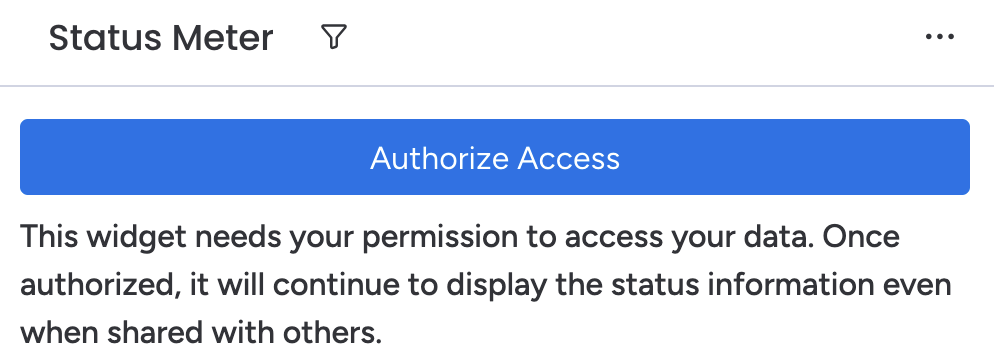
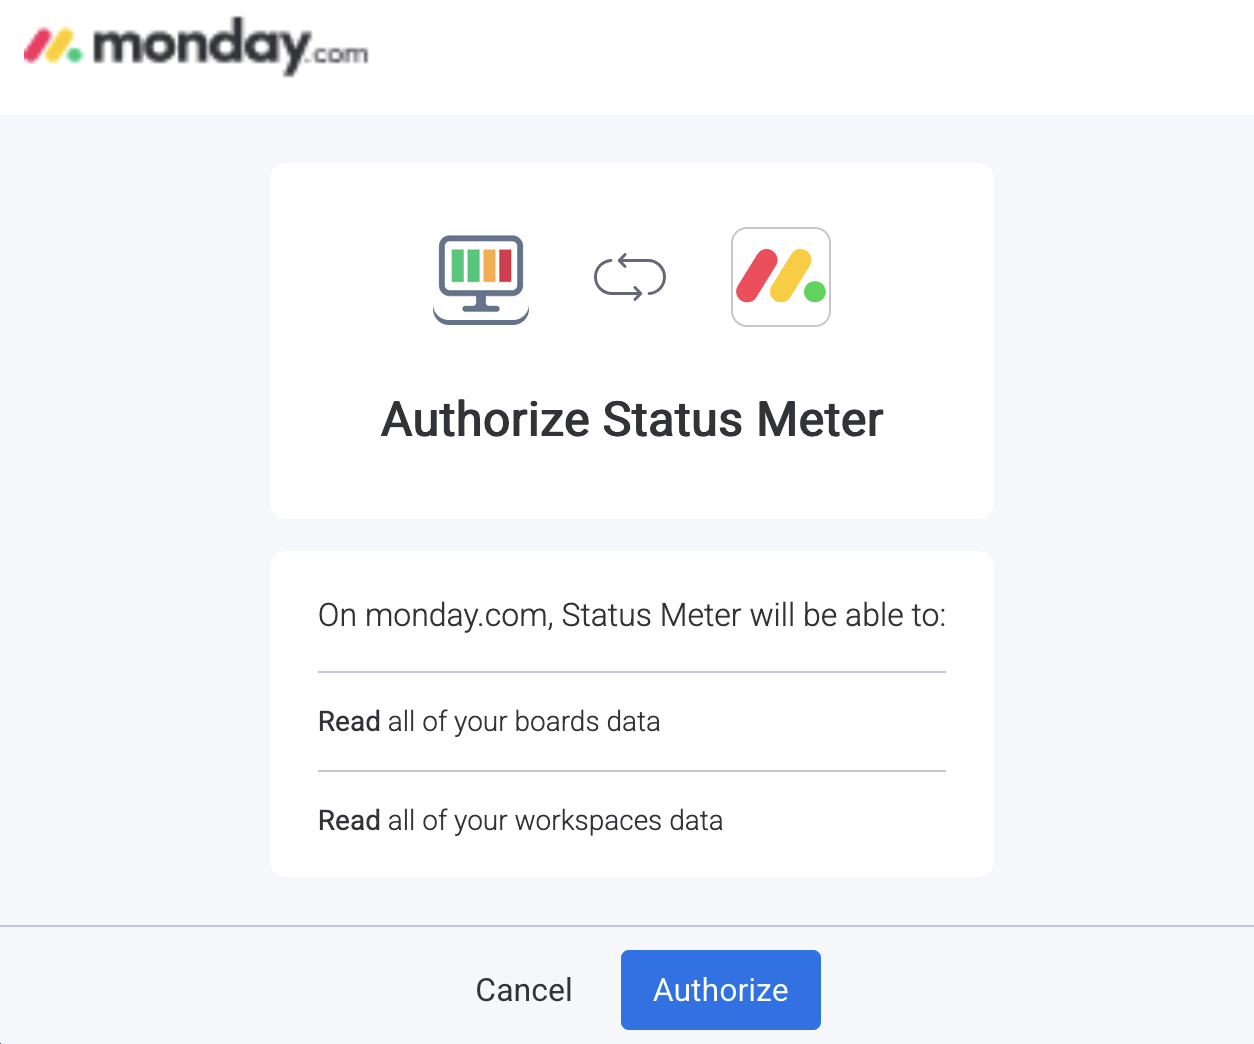
Authorize the app to access your monday.com workspaces and boards.
-
Position the widget on your dashboard as desired.


3. Select Sources
Configure Status Meter to pull data from your monday.com sources. Select the workspaces, boards and groups you want to track.
-
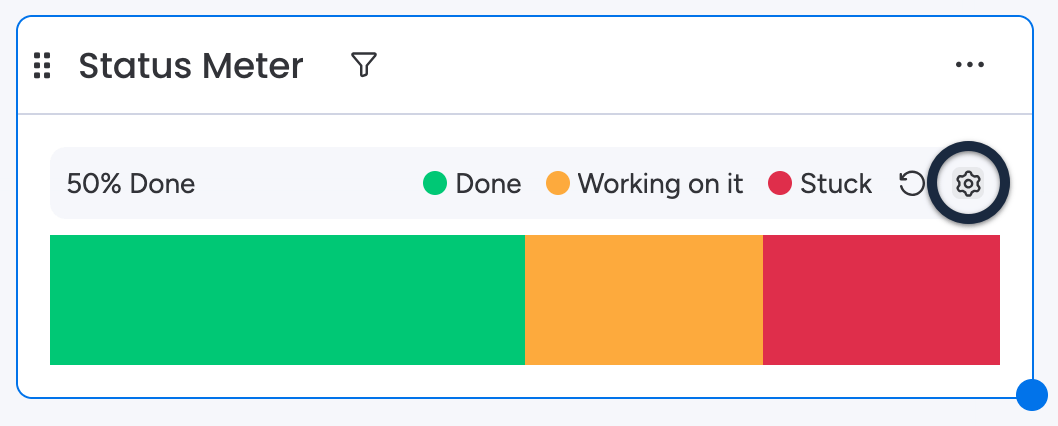
Click the Settings icon on the widget to open configuration
options.
-
Choose the workspaces, boards, and groups that contain the status
columns you want to track.
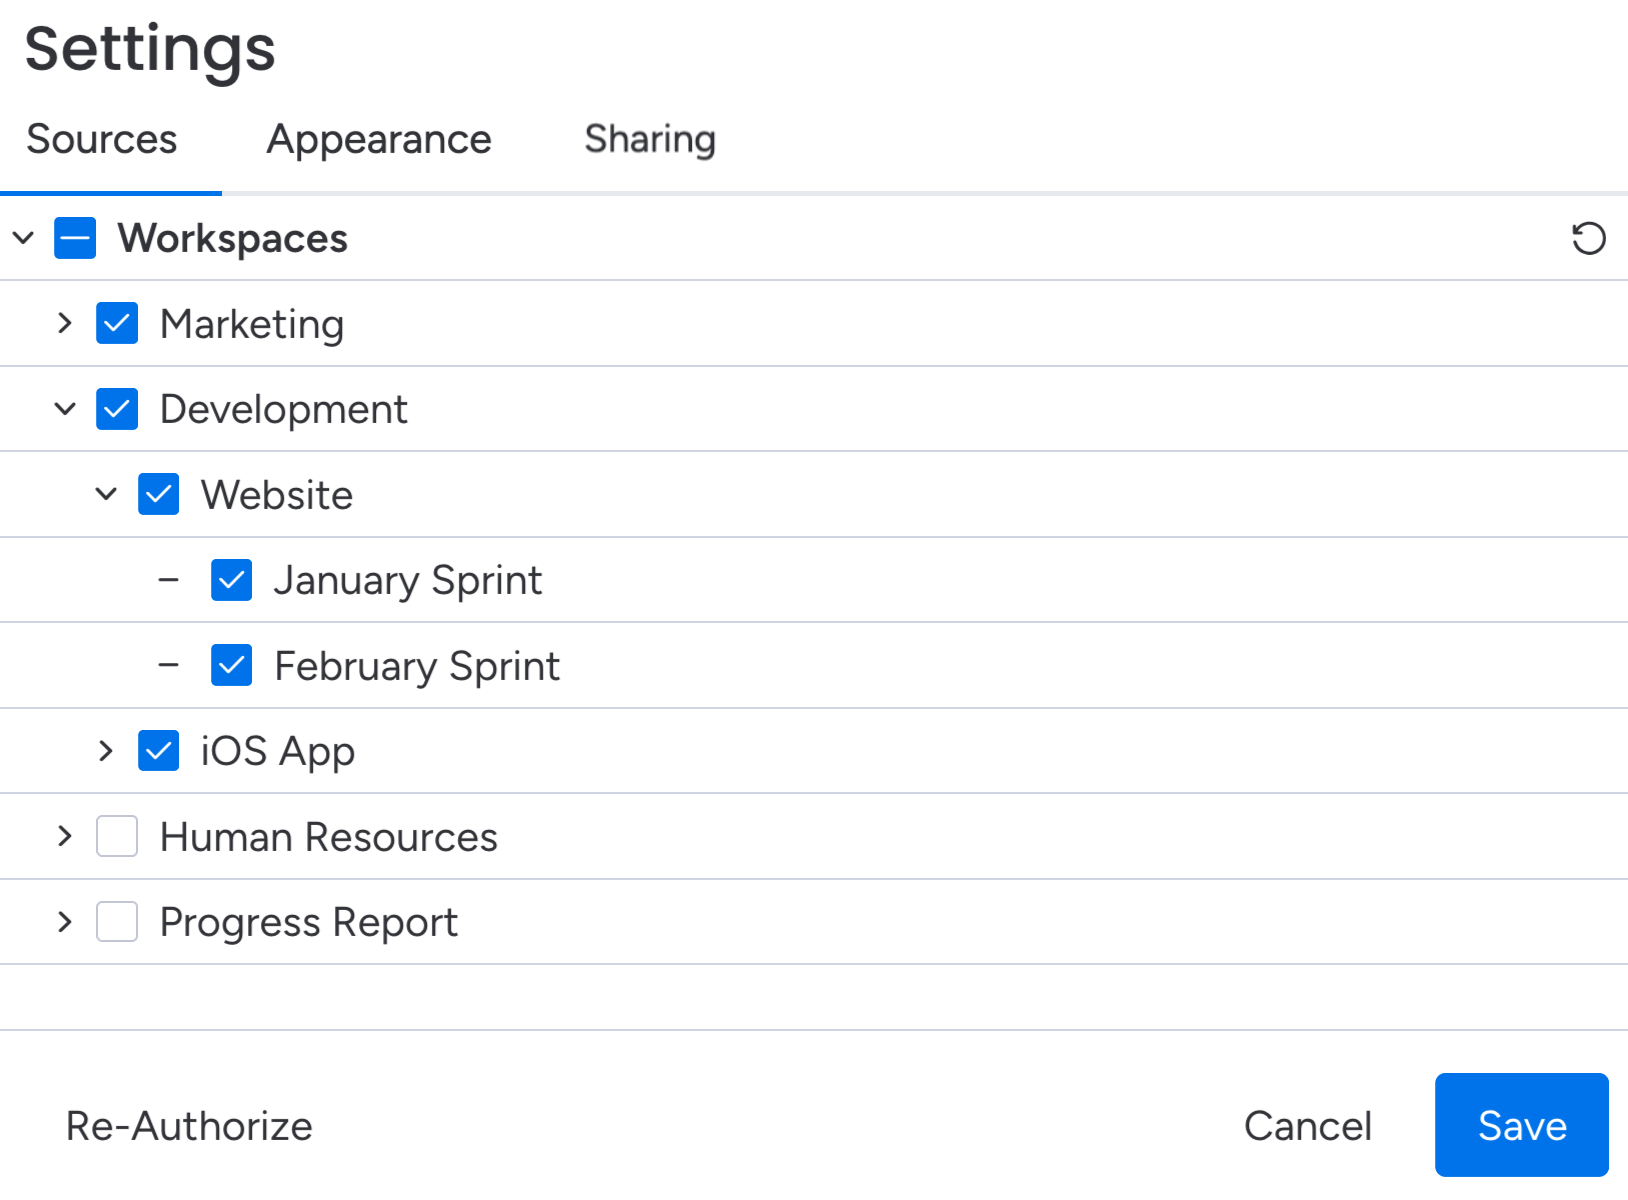
-
Save your selections to have Status Meter start tracking progress
from the chosen sources.
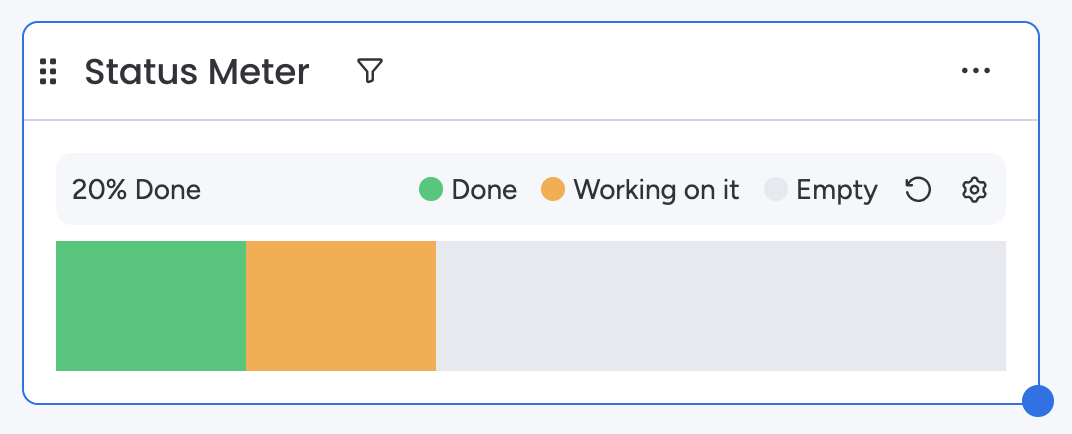


4. Share with Clients and Stakeholders
Once your status meter widget is set up, share the status with clients and stakeholders. The data will update periodically to reflect the latest progress from your selected sources and keep everyone informed.
